
Calligraphy, often referred to as the art of beautiful writing, is a captivating and elegant form of self-expression that has been cherished for centuries. Whether you’re a complete novice or have dabbled in calligraphy before, this comprehensive guide, is tailored to help you embark on a fulfilling journey into the world of calligraphy.
In this extensive guide, we will delve into the fundamentals of calligraphy and gradually lead you towards becoming a proficient calligrapher. By understanding the key principles, essential tools, and practice techniques, beginners and professionals can unlock the door to this captivating art form and develop your skills to create stunning, handcrafted lettering.
Chapter 1: An Introduction to Calligraphy
Before diving into the practical aspects of calligraphy, let’s start with a brief overview of what calligraphy is and why it’s worth exploring. Calligraphy, derived from the Greek words “kallos” (beautiful) and “graphia” (writing), is the art of creating decorative and expressive hand-lettering. It goes beyond mere writing; it’s a form of visual art that transforms words into works of beauty.
Imagine being able to convey not only the meaning of words but also the emotions and aesthetics behind them through your writing. Calligraphy allows you to do just that. It’s a timeless art form that can be both meditative and expressive, making it a perfect hobby for those seeking a creative outlet or a way to enhance their communication skills.
Chapter 2: Calligraphy Styles and Their Beauty
As a beginner in the world of calligraphy, it’s important to acquaint yourself with various calligraphy styles. Each style has its unique charm and history, and understanding them will help you choose the one that resonates with you. Some popular calligraphy styles include:

Copperplate
Known for its flowing, graceful script, Copperplate is often used for formal invitations and certificates, making it an ideal choice for beginners looking to add an air of elegance to their writing.
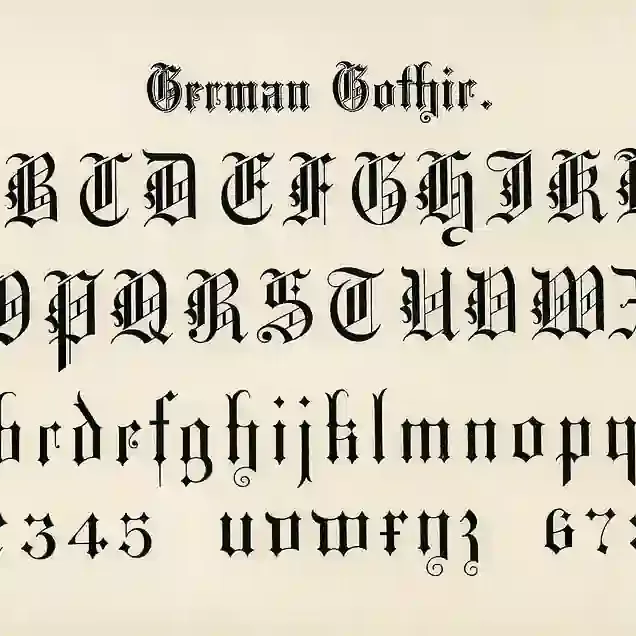
Gothic
Recognized for its bold, angular letterforms, Gothic calligraphy imparts a sense of strength and solidity to your writing. It’s a style that can be both intriguing and accessible for those starting their calligraphy journey.

Italic
Famous for its slanted and cursive appearance, Italic calligraphy is both elegant and legible. It’s a great option for beginners as it allows for a graceful and stylish handwriting transformation.

Brush Lettering
Utilizing brush strokes to create dynamic lettering, this style allows for a wide range of creative expression. While it may seem intimidating, it can be an exciting choice for beginners eager to experiment and infuse their calligraphy with a modern touch.
Exploring different styles is a fun and enlightening journey for calligraphy beginners. You may discover that you’re drawn to one style in particular, or you may choose to master several styles to expand your repertoire. Regardless of the path you choose, each style offers its own unique beauty and challenges, making your calligraphy journey all the more rewarding.
Chapter 3: Essential Tools for Beginner Calligraphers
To commence your calligraphy journey, equipping yourself with the right tools is essential, especially for beginners like you. Here’s a list of indispensable items you’ll need:
- Calligraphy Pens: Your choice of calligraphy pen depends on your preferred style. You can select from fountain pens, dip pens, or brush pens, each offering a unique writing experience. Don’t hesitate to experiment with different types to find the one that suits your hand and style best. I highly recommend having a look at the top calligraphy sets for beginners.
- Nibs: Nibs are the pointed tips that come in various sizes and shapes, enabling you to achieve different lettering effects. They are replaceable, allowing you to tailor your nib to your specific needs and preferences as you progress in your calligraphy journey.
- Ink: High-quality, non-waterproof ink is a must-have for achieving smooth and consistent lines in your calligraphy work. As you gain experience, you can experiment with different ink colors to add variety and creativity to your projects.
- Paper: The choice of paper is crucial for calligraphy practice. Opt for acid-free, smooth, and non-absorbent paper, as it allows your ink to flow smoothly and your lettering to look its best. Investing in quality paper ensures that your practice sessions and final pieces are of the highest quality.
- Guidelines: Guidelines are invaluable, especially when you’re learning and practicing new calligraphy styles. They help you maintain uniform letter size and spacing, ensuring that your lettering looks polished and professional.
Remember that investing in high-quality tools from the outset will significantly enhance your calligraphy experience. While it might be tempting to start with budget options, consider that superior tools not only make your practice more enjoyable but also yield better results, setting you on the path to becoming a skilled calligrapher.
Chapter 4: Mastering the Basic Strokes
Now that you’ve familiarized yourself with the essential tools and explored different calligraphy styles, it’s time for you, as a beginner in the world of calligraphy, to roll up your sleeves and start practicing calligraphy for beginners. The foundation of calligraphy lies in mastering the basic strokes, which are the building blocks for creating beautiful letters and words.
The primary basic strokes you should focus on as you embark on your calligraphy for beginners journey are:
- Upstroke: This is the stroke where you move your pen or brush upwards. It is typically lighter and thinner than the downstroke.
- Downstroke: As the name suggests, the downstroke involves moving your pen or brush downwards. Apply more pressure to create a thicker line.
- Compound Curve: It’s a combination of the upstroke and downstroke, forming an elegant, flowing curve.
Practice these basic strokes repeatedly to develop muscle memory and control over your tools. Pay close attention to the angle and pressure you apply to the pen or brush, as mastering these fundamental strokes is the key to achieving beautiful calligraphy results.
Remember, the journey to becoming a skilled calligrapher begins with mastering these basic strokes. As you become more proficient, you’ll be able to create stunning letters and words that showcase your dedication and passion for the art of calligraphy. Keep practicing and refining your technique to unlock the full potential of this beautiful craft.
Chapter 5: Practicing Letterforms
With a solid understanding of the basic strokes, it’s time to progress to practicing individual letters of the alphabet in your chosen calligraphy style, especially if you are delving into calligraphy for beginners. Keep in mind that each style comes with its own unique set of letterforms and variations, so it’s important to refer to style-specific resources and guides.
As you delve into letterforms, pay attention to the following subtle yet essential aspects:
- Consistency: Strive to maintain uniformity in the size and style of each letter. Consistency is the bedrock of refined calligraphy, setting the stage for polished work.
- Spacing: Observe the spaces between letters carefully, ensuring they remain even and visually pleasing. Proper spacing ensures that your words flow gracefully and are a pleasure to read.
- Proportion: Maintain proper proportions for each letter relative to the others. This practice ensures that your calligraphy retains a sense of balance and aesthetics throughout your composition.
This phase of practice is pivotal as it lays the groundwork for crafting words and sentences that are not only artistically harmonious but also visually captivating. Becoming adept at forming letterforms is a fundamental step in your journey to mastering calligraphy, particularly if you are embracing calligraphy for beginners.
Chapter 6: Word Composition
Once you feel confident with individual letters, it’s time to progress to composing words and phrases. This is where the art of calligraphy truly comes to life. Experiment with different words and phrases, paying attention to letter spacing and connections between letters.
Tips for word composition:
- Draft Your Layout: Sketch out the arrangement of your words and any decorative elements before committing them to paper.
- Consistent Style: Ensure that each letter maintains the same style throughout the word or phrase.
- Flow: Strive for a natural and flowing look by connecting letters where appropriate.
Creating beautifully composed words and phrases requires practice and patience. You’ll find that as you continue to work on word compositions, your calligraphy skills will continue to improve, and your work will become increasingly expressive and appealing.
Chapter 7: Layout and Design
Understanding the principles of layout and design is pivotal when crafting visually appealing calligraphy pieces, especially for those venturing into calligraphy for beginners. Elements such as balance, contrast, and hierarchy wield significant influence over the overall aesthetics of your work.
Here are some key design principles to consider:
- Balance: Achieving balance is essential. Distribute visual weight evenly across your composition to create a sense of equilibrium. For instance, if you incorporate a substantial flourish on one side, counterbalance it with an element on the opposite side to maintain overall harmony.
- Contrast: Leverage contrast in various ways, whether it’s through differing letter sizes, styles, or colors. Skillful use of contrast can draw attention to specific words or phrases, injecting vitality and impact into your composition.
- Hierarchy: Establish a clear hierarchy of information to guide the viewer’s eye smoothly through your composition. Ensure that the most vital words or messages are emphasized appropriately, enhancing the overall readability and comprehension of your work.
As your proficiency in calligraphy grows, don’t hesitate to explore more complex layouts and design elements to elevate your calligraphy projects. The art of design adds depth and personality to your calligraphy, transforming it from mere beauty into a visual experience that leaves a lasting impression.
Chapter 8: Perfecting Your Craft
Becoming a proficient calligrapher is an ongoing journey, and the pursuit of perfection is a path paved with practice and unwavering persistence, especially for those exploring calligraphy for beginners. In this chapter, we delve into various aspects of honing your calligraphy craft.
- Consistency: Consistency stands as the cornerstone of achieving polished calligraphy. Your ultimate goal should be the uniformity of letter size, spacing, and style. Regular practice is your steadfast ally in developing the muscle memory required for consistent letterforms.
- Practice Sheets: Incorporating practice sheets into your daily routine is a wise strategy. These sheets come complete with guidelines tailored to different calligraphy styles, providing a structured and purposeful approach to practicing letterforms, words, and even entire compositions.
- Exemplars: An exemplar serves as a beacon of inspiration—a sample of well-executed calligraphy in a specific style. Immersing yourself in exemplars deepens your understanding of the subtle nuances of a particular style, ultimately enhancing your prowess as a calligrapher.
- Mistakes Are Learning Opportunities: Embrace mistakes as invaluable chances for growth on your calligraphy journey. Instead of shying away from errors, view them as stepping stones toward achieving calligraphic excellence. Analyze your mistakes, glean insights from them, and let them propel you forward on your quest for mastery.
Chapter 9: Flourishes and Decorations
Adding flourishes, embellishments, and decorative elements can take your calligraphy to the next level. Flourishes are graceful, curving strokes that add elegance and flair to your work. Experiment with different types of flourishes and discover how they can enhance your compositions.
- Flourish Placement: Learn where to place flourishes to complement your calligraphy. They can accentuate capital letters, frame your work, or fill empty spaces beautifully.
- Consistency in Flourishes: Maintain consistency in the style and size of your flourishes to ensure they harmonize with your overall composition.
- Practice Flourishing: Dedicate time to practicing flourishes separately. This will enhance your control and confidence when incorporating them into your calligraphy.
Chapter 10: Color and Ink Variations
While traditional calligraphy is often associated with the timeless elegance of black ink, embracing experimentation with different ink colors and shading techniques can be an exciting journey, especially for those exploring calligraphy for beginners. The addition of color has the potential to infuse depth and vibrancy into your calligraphy projects, elevating them to new heights of visual appeal.
Here are some considerations when introducing color to your calligraphy:
- Color Choices: Delve into the psychology of color and contemplate the mood and purpose of your piece before selecting ink colors. Vibrant and lively colors can convey energy and joy, while subtle and muted tones may evoke elegance and subtlety. Choosing the right color palette can significantly impact the emotional resonance of your work.
- Gradient Effects: Embark on the artful exploration of gradient effects by blending two or more ink colors together. This technique can give rise to stunning transitions and highlights within your calligraphy, creating a captivating visual journey for the viewer.
- Shading Techniques: Dive into the realm of shading techniques to impart dimension to your letters. Techniques like cross-hatching or stippling can breathe life into your calligraphy, making it visually dynamic and adding an extra layer of sophistication to your compositions.
Chapter 11: Troubleshooting and Improvement
Even experienced calligraphers encounter challenges. This chapter addresses common calligraphy pitfalls and offers tips for overcoming them. Additionally, we’ll discuss strategies for continuous improvement, from seeking feedback to setting achievable goals.
- Ink Flow Issues: If you’re experiencing inconsistent ink flow, it may be due to clogged nibs. Regularly clean your nibs to ensure smooth writing.
- Ink Bleeding: Prevent ink bleeding on paper by using the right paper type and quality for your ink. Experiment with different papers to find the best match for your ink.
- Achievable Goals: Set realistic goals for your calligraphy journey. Whether it’s mastering a specific style or completing a certain number of projects, goals keep you motivated and on track.
Chapter 12: Going Beyond the Basics
As you gain confidence and proficiency in calligraphy, consider exploring advanced techniques and styles. Brush calligraphy, pointed pen variations, and contemporary calligraphy styles can offer new creative avenues to explore and master.
- Brush Calligraphy: Brush calligraphy employs soft-tipped brushes to create expressive, fluid letterforms. It’s known for its versatility and is particularly popular for creating bold, modern designs.
- Pointed Pen Variations: Experiment with different types of pointed pen calligraphy, such as Spencerian script or Engrosser’s script. These styles offer intricate and ornate letterforms.
- Contemporary Styles: Explore modern calligraphy trends, which often blend traditional techniques with fresh, innovative approaches. These styles can help you develop a unique calligraphic voice.
Chapter 13: Projects and Applications
Putting your calligraphy skills to practical use can be highly rewarding. Learn how to create personalized greeting cards, address envelopes beautifully, design wedding invitations, and more. The applications of calligraphy are vast and can add a touch of elegance to various aspects of life.
- Greeting Cards: Design personalized greeting cards for special occasions. Your calligraphy will add a heartfelt touch to your messages.
- Envelope Addressing: Master the art of addressing envelopes beautifully, turning a simple task into an elegant presentation.
- Wedding Invitations: Design exquisite wedding invitations that showcase your calligraphy skills and create lasting memories for the couple and their guests.
Chapter 14: Sharing Your Work
Joining calligraphy communities, attending workshops, and sharing your work on social media platforms can help you connect with fellow calligraphers, gain valuable feedback, and showcase your talent to a wider audience. It’s also an opportunity to inspire and be inspired by others in the calligraphy community.
In conclusion, this guide has taken you on a comprehensive journey through the captivating world of calligraphy. From understanding calligraphy styles and essential tools to layout, design, and advanced techniques, this guide has equipped you with the knowledge and skills needed to become a proficient calligrapher.
As you embark on your calligraphy journey, remember that mastering this art takes time, patience, and practice. Embrace mistakes as opportunities for growth and celebrate your progress. Engage with the calligraphy community, share your work, and seek inspiration from fellow calligraphers.


